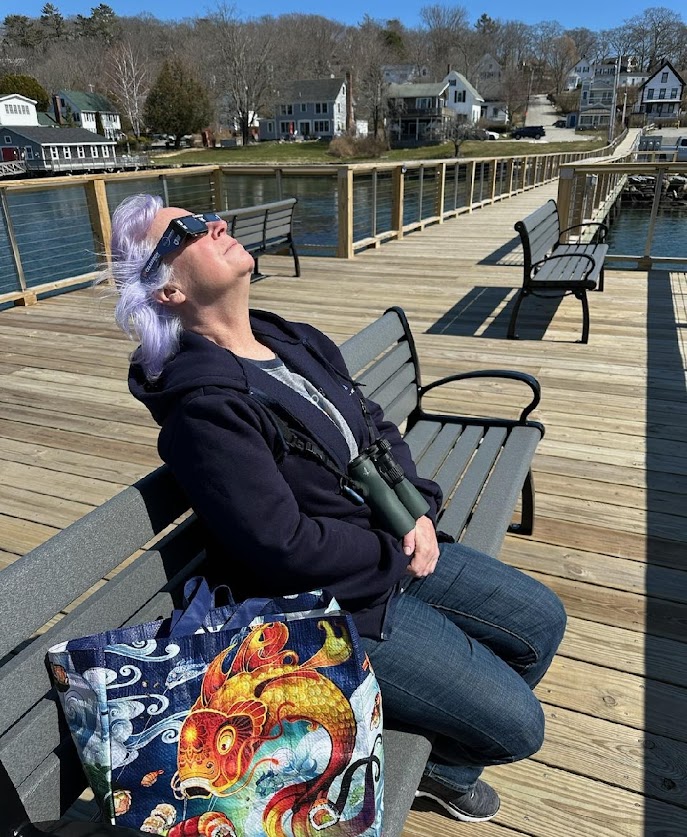
Total Solar Eclipse, April 8, 2024
Steve here. We had a gorgeous day for the solar eclipse. We set up on the footbridge in Boothbay Harbor, ME, which reached 96% totality. Above, Cat observing before start with her eclipse glasses. There were Eider and Merganser ducks nearby as well, so she was looking at them through her binoculars. Photos by Steve Branam except as noted.
DO NOT LOOK AT THE SUN DIRECTLY OR THROUGH A SCOPE, LENS, OR CAMERA WITHOUT PROPER SOLAR FILTRATION! DO NOT POINT A SCOPE, LENS, OR CAMERA AT THE SUN WITHOUT PROPER SOLAR FILTRATION! IT WILL PERMANENTLY DAMAGE YOUR EYES, THE SCOPE, THE LENS, THE CAMERA IMAGE SENSOR VERY QUICKLY! ECLIPSE GLASSES/FILTERS MUST BE RATED "ISO 12312-2" (SOMETIMES WRITTEN AS "ISO 12312-2:2015")!
My observation position. Photo by Lisa Matthews. See Technical Details section below for the dual camera/telescope rig.
These photos show the sequence, with the sliver in the middle at the peak.
This is my first cut at the time-lapse video of the eclipse. My polar alignment for the tracking mount was a little off, so the sun appears to drift in the frame, and I had to reset the position a couple times. I like the way the sliver of sun does a little flip around the edge through the peak totality.
Half the fun of an eclipse is sharing the experience with friends! From left, Kari Smith, me, Cat, and Nancy McGovern (photo by Lisa Matthews):
The day started out near 60 degrees F with a light breeze, but during the peak eclipse it got 10-15 degrees cooler and the wind picked up, so we added layers! From left, me, Cat, Lisa Matthews, Nancy McGovern, and Kari Smith (photo by Roger Matthews):
Technical Details
I created the time-lapse as described in FIRST ATTEMPT AT ASTRO TIME-LAPSE (see that post for equipment and process description), using a Canon 100-400mm RF lens set at 400mm (switched to manual focus), and a Celestron – EclipSmart Safe Solar Eclipse Telescope and Camera Filter. I shot the sequence at ISO 200 on the "P" (Program auto-exposure) setting.
The only difference from my previous astro time-lapses (see SECOND ATTEMPT AT ASTRO TIME-LAPSE: ORION SETTING for one that came out well) is that instead of using the phone app to control the Star Adventurer tracking mount, I set its manual control knob to solar tracking rate and used a separate intervalometer to trigger exposures.
I started with 1 frame every 2 seconds. However, that used up the first camera battery before the moon was even halfway across the sun.
After swapping out the battery, I reduced the frequency to 1 frame every 30 seconds. That got through the rest of the eclipse. For the last 20 minutes, I increased the frequency to 1 frame every 5 seconds; that's why the video slows down at the end.
I used the fantastic e-book How to Photograph the Solar Eclipses by Alan Dyer for information on this. It's full of details about various photographic setups, and I highly recommend it for upcoming eclipses around the world.
I'll try some astrophotography software to see if I can improve the video framing. Dealing with image sequences in changing orientation is one of the features of this kind of software.
This photo shows how I set up the equipment on the Star Adventurer. I used a dual camera/telescope setup so that the mount would keep both on target as it tracked the sun (it's hard to share a telescope view with other people without tracking, because the target keeps moving out of frame). The telescope is specifically for solar observation, Celestron – EclipSmart Safe Solar Eclipse Telescope – 50MM Refractor.
This is the view through the telescope, taken with a cellphone camera held up to the eyepiece. You can see a couple of sunspots.
For direct viewing, we used Celestron – 2-Pack EclipSmart Safe Solar Power Viewers – 2X Magnification and Celestron – EclipSmart Safe Solar Eclipse Glasses Family 4-Pack.


Comments
Post a Comment